When creating new web applications, there is something I’ve always struggled with in the past.
It’s creating and testing emails.
So in this Railsjutsu, I want to show you how you can simplify your email creation workflow in development. With the following gem and some nice Rails features, you will be able to customize how your emails look and check when they are sent.
Introduction
Letter Opener is a super useful gem built by Ryan Bates. It allows you to send emails in your development environment. It won’t send it to your email client though, it will just pop a new tab in your browser with the email. Sweet right?
Let’s build something!
Setup
So let’s get started. We’ll build a very basic application that will send an email when we access a specific endpoint.
Let’s create a new application.
rails new letter_opener_jutsuNow let’s add the gem to our Gemfile in the development group.
gem 'letter_opener', :group => :developmentFollowed by a quick bundle install.
Configuration
Now we need to change the delivery method for development in config/environments/development.rb:
config.action_mailer.delivery_method = :letter_openerAnd that’s it for the configuration. Now let’s add a controller with one action that sends an email.
Creating a controller
Let’s create a new file in app/controllers named home_controller.rb with the following content.
class HomeController < ApplicationController
  def index
    render json: {}
  end
end
And update the routes file (config/routes.rb) to direct the user to this action:
Rails.application.routes.draw do
  root 'home#index'
end
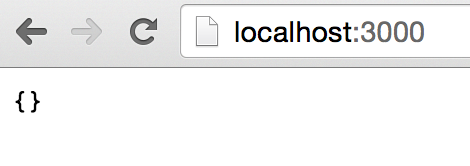
Let’s take a quick look at http://localhost:3000:

Cool, now we can add an email.
Generating a mailer
Let’s use Rails generator to create it!
rails generate mailer HomeMailerNow that we have a mailer, we can add a method to send a welcome email.
# app/mailers/home_mailer.rb
class HomeMailer < ApplicationMailer

  def welcome
    mail(to: 'random@example.com', subject: 'Welcome!')
  end

end
And create the corresponding view.
# app/views/home_mailer/welcome.html.erb
<h1>Welcome!</h1>
Sending the email
Last step to have our email working, we need to send it from the controller!
# app/controllers/home_controller.rb
class HomeController < ApplicationController

  def index
    HomeMailer.welcome.deliver_now
    render json: {}
  end

end
And we’re done ;)
The Result
Everything is ready, let’s give it a try. Start your application and head over to http://localhost:3000.
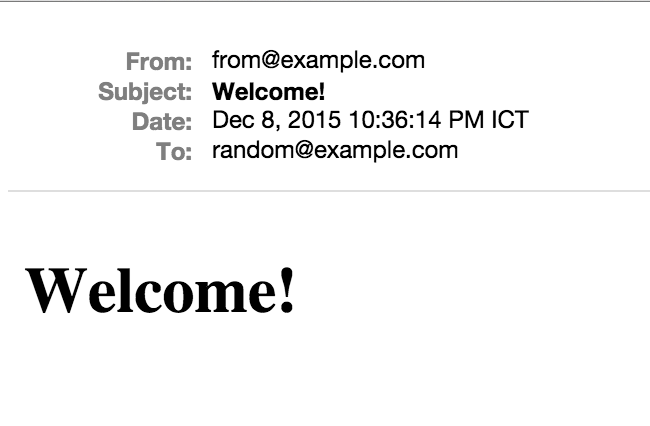
And boom! You should see a new tab opening in your browser with the following inside:

Wicked!
Designing your email
But wait! You don’t have to repeat the same action over and over again just to see how your email looks like. Letter Opener is more to see that the right stuff is sent at the right time. To design your email, you can just use am ActionMailer feature: the Preview!
When we generated our mailer earlier, we actually got the following file created test/mailers/previews/home_mailer_preview.rb. We can just add a method to this class and we’ll be able to visualize our email!
Let’s add a method named welcome that will just send our welcome email. If we had any parameter, like a user for example, we could just pass the first user for example with HomeMailer.welcome(User.first).
Here’s the code:
# test/mailers/previews/home_mailer_preview.rb
# Preview all emails at http://localhost:3000/rails/mailers/home_mailer
class HomeMailerPreview < ActionMailer::Preview

  def welcome
    HomeMailer.welcome
  end

end
Now we can simply access the provided url (http://localhost:3000/rails/mailers/home_mailer) and we will see our welcome method. Click on it and you will be taken to your email! Now you can super easily create it and visualize it.
Before Rails 4.1, I was using the gem mail_view to do this kind of stuff. Luckily, it got merged into Rails and is now the ActionMailer::Preview!
Keeping track of the sent emails
Before wrapping up, just a quick note about another neat little gem that lets you keep track of all the emails that were sent. The gem is called Letter Opener Web and will give you a web interface to browse all the emails sent from your application.
Wrap Up
That’s it for this Railsjutsu, I hope you learned a few things along the way ;)


